Tuesday, December 27, 2011

It's a Bird...It's a Plane....

Today's frugal find is another Do-It-Yourself project: T-Shirt Superhero Capes! These DIY capes are cheap, simple, and sure to bring hours of endless fun.  I made all 3 of these in just a few hours and spent less than $5.00 total.  Want to be extra frugal?  Use an old T-shirt!  


1.  Cut the sleeves and the front out of a T-Shirt.  I used adult sizes to achieve the desired length.
2.  Use fun fabric to create some sort of design for the back.  I used a star and a lightening bolt.  I also added a ruffle to the bottom of the girl's cape.  The sky's the limit.  
3.  Apply Iron-On to the back of your patterned fabric.  (Iron-on can be found at any fabric store and comes with instructions.)  Apply your design to the back of the cape.
4.  You can also use the extra T-shirt fabric to make arm bands or an eye mask. 

Cape Idea Adapted from: lookwhaterinmade.blogspot.com

Sunday, December 18, 2011

It's just that easy... DIY T-Shirt Bracelet

This Christmas I find myself caught up in the whole "Do-It-Yourself" thing.  Crafting has been a lot of fun and has been gentle on our Holiday budget.  I had thought about blogging a DIY gift idea the 12 days leading up to Christmas until I realized most of the people I am making these gifts for follow my blog.  So instead, as I give these gifts away, they will also slowly make their way onto my blog.  Here we go....

T-Shirt bracelets are my frugal DIY gift I made for the young ladies in my small group at The Edge this year.  They were fast, simple, cheap, and trendy which is exactly what I was looking for since I needed 12 of them.  All you need is an old T-Shirt and some hot glue.  I also added in a strand of craft pearls which I had laying around from our wedding decorations.  If you don't have a T-Shirt you want to cut up you can find them at any craft store in just about any color.  I actually found mine at Menards for $1.50 each.  A Men's XL can easily make 20 bracelets depending on the thickness you desire.  According to my figures, I spent less than 10 cents a bracelet.  If that's not frugal I don't know what is!

Step 1.  Cut 3 strips of fabric about 12 inches long.  Stack on top of one another.  I used dabs of glue to hold them in place.  If you are using a pearl strand place it on top of the fabric strips.  Shut end in drawer and braid the 3 strands keeping the pearls with one. 

Step 2:  Hot glue the last few overlaps of material when you have finished braiding.  At this point you should have a strand of braid with the ends glued together so it doesn't unwrap. 
Step 3:  Hot Glue the two ends together to make a bracelet.  You may want to cut a strip of T-shirt to cover up the overlap area.  Glue it in place. 
There you have it. 5 minute T-Shirt bracelets! 

Saturday, December 10, 2011

The Frugal Tree

The day after the first Christmas Paul and I spent as an engaged couple we got up early and made our way to Target for their "after Christmas" sale.  We bought  all of our Christmas tree decorations that day.  From lights to ornaments we would be set to go for years to come.  Little did we know that 6 years down the road we would be itching for something new.  Although I would recommend "after Holiday" shopping when at all possible, that is not what this frugal find is about.  In an attempt to switch up the tree this year we went the homemade route and came up with an entirely different tree at a very do-able price.  So here we go....

Our Candy Themed Tree.  We used colored lights that we had as opposed to our usual white lights.

Popcorn and Twizzlers String.   All you need is stale popcorn, twizzlers, and a needle and thread. (Cost $2)

Peppermint Ornaments.  I used both red and green peppermint candy and red hots.  Add a little hot glue, a loop on top, and there you have it.  (Cost $4 makes around 30)


Lollipop Tree topper.  I bought the lollipop at the Dollar Tree and used a piece of scrap ribbon to tie around it.  We found twist ties to do the trick to attach it to the top.   (Cost $1)

No Sew Tree Skirt.  I picked out some fabric, bought a piece of painters cloth for the bottom, and used hot glue to put together this ruffle tree skirt.  (Cost $9)

Want to make your own?  For step by step instructions I used the following blog:  http://mycrazylife-lauren.blogspot.com/2011/11/i-pinned-it-i-did-it-ruffled-tree-skirt.html


Saturday, December 3, 2011

Freeze It!

Winter is just around the corner..... actually, it is here!  Unlike many I love winter.  I love the snow,  the cold, and layers of over sized comfy clothing.  There are a few things about winter however, that make being frugal a little more complicated.  Take fresh produce for example.  Not only is the selection and quality lacking during the cold winter months, but the prices jump.  I find myself planning my menu for the week purposely avoiding those fruits and veggies that I love but know will cost sometimes as much as 3 times more than the summer months.  This year I have decided to do something about it.  It's called a freezer.

This week while at Festival Foods I noticed green peppers for less than a dollar a piece and they looked fantastic.  I decided to buy a bunch and then cut and freeze them.  I also measured them out based on certain recipes that I often use so I can simply grab them out as I need them this winter and won't have to pay the high prices in the store.  For me, saving a few extra dollars throughout those long winter months matters.   Happy Frugal Freezing!   

Wash, Cut, and Freeze!

Green Peppers measured and ready to go for fajitas, pizza, casserole, and eggs.  Old baby food containers are the perfect size for freezing!

I also stocked up on ham for casseroles, soup and omelets which was a great buy too! 


Monday, October 31, 2011

If the Shoe Fits

I am very picky when it comes to "clearance" to the point of sometimes being hard to shop with; just ask my husband.  Let's take shoes for instance.   Rarely will I fork out over $10 on a random shoe find on any given shopping trip.  I love cute things and believe that in most instances you don't have to compromise your budget to find them.

Thanks to a tip from a friend I learned that our local Payless Shoe Store had some great clearance shoes.  My Mom was in town so we stopped in to check it out.  Four pairs of shoes later we walked out of there more than thrilled.   Our total bill for these 4 pairs of new shoes was a whopping $11.87.  According to the sticker price our full price total would have been $80.00.  That is quite the difference and this week's Frugal Find. 


Jewelry was also an added bonus!  2 Rings, 1 necklace, and a set of bracelets for $4 total.  Needless to say we had a whole lot of frugal fun!


Tuesday, October 25, 2011

DIY Party Hats

This week my small group of 6th Grade girls is having a "Happy Birthday" party. With the size of the group it quickly became obvious that this party could get expensive and in a hurry.  It was time to put my frugal find mind to work.  Every good party needs a party hat so after a little research on Pinterest (my newest addiction), I came up with a plan of attack. 

Step 1:  Gather materials.  I used colored card stock, tissue paper, ribbon, and crepe paper.  Next time I would like to try using patterned scrapbook paper.

Step 2:  Trace and cut out your hat.  The template I used can be found at http://www.floodstreetpress.com/download/ohhappyday_partyhats_template.pdf

Step 3:  Add Trim.  Cut a piece of crepe paper to go around the bottom of your hat.  Fold in half lenghwise.  On the raw edge cut fringes in the paper.  Unfold. 
Step 4:  Put hats together and fit the piece of crepe paper on the fold over the brim of the hat.  Staple around the hat.

Step 5:  Fluff the trim to cover the staples and add volume.
Step 6:  The Topper.  Cut a rectangle of tissue paper.  (I doubled it for volume).  Fold about 1/2 inch and continue to fold until you reach the end.  Cut Slits in top.  Twist bottom and push through top of hat.   I secured it on the inside with a piece of tape.

Step 7:  Flowers.  Cut a rectangle into tissue paper (again, I doubled it for volume).  Fold as directed above.  Cut slits on top and bottom.  Fold in half so fringes are together.  Staple to hat and arrange the tissue paper to add shape and volume.
Step 8:  Attach ribbon for a chin strap.  I used tape.  There you have it - Party Hat complete!  Do it yourself is this weeks frugal find!    

Monday, October 17, 2011

Save Some Dough- Homemade Bread

Bread is a staple in most households.  We eat it as toast for breakfast, create a sandwich in it for lunch, and put butter on it for dinner.  So just how much does this "basic" cost the average American family?  Is this really an area that we can cut costs and pocket some money at the end of the year?  Absolutely!  The answer: make your own bread.

Many of us simply don't have the time to go through the bread making process that our Grandmother's did (and some still do).  Luckily, there is a modern day marvel and it's called a bread machine.  I love my bread machine.  It takes me a total of 5 minutes to throw in a loaf of bread and maybe another 2 to clean up my mess.  Throw in the ingredients, push the button, and walk away.  It is just that easy and 3 hours later a warm loaf of bread is waiting on my kitchen counter.  Not only is it delicious (and makes your house smell amazing too) but it is the healthier option.  You know what is in it, you can pronounce every ingredient, and there are no preservatives.  It's back to the basics.

Now let's crunch some numbers and figure out what is so frugal about this find.  Based on the formula that the average family consumes 1 loaf of bread a week and assuming that a normal loaf of bread from the store is right around $3.00, the amount spent in a year is $156.00.  If you purchase your own ingredients and use a bread machine, the average family will spend only $53.60 in a year.  (This includes the energy costs of using a bread machine which is roughly $12.00 a year based on your machine and energy costs)  That is a yearly savings of $102.60!!!

I love penny pinching because every $100 here and there that I can save in a year adds up quickly and becomes a significant amount by the end of the year.  So there you have it - bread machine bread is a fantastic frugal find!

Warm Homemade Wheat Bread  (Roughly 80 cents a loaf)


Please note that there is the initial upfront cost of the machine itself.  If you buy new it will  pay for itself within the first year.  I suggest purchasing a slightly used machine for a fraction of the cost which are easy finds at garage sales or thrift stores. 

Monday, August 29, 2011

Homemade Salsa

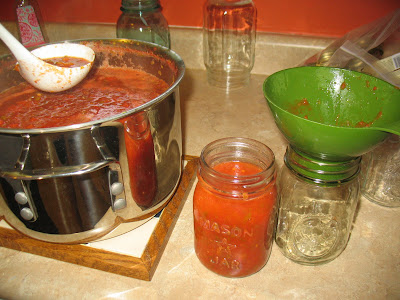
Salsa has become a staple in our household.  Running out of salsa is like running out of ketchup around here, it just doesn't happen.  My Mom has always made and canned a really good salsa recipe which has been mostly a blessing, and a little bit of a curse.  The curse being we have become salsa snobs.  Any kind of salsa not specialty or restaurant quality doesn't taste good to us.  As you can imagine, I do not get too excitied about dropping extra money on a decent jar of salsa which we usually devour within the week.  For that reason, and also for the sake that homemade salsa tastes so much better, I now follow in my Mother's footsteps. 

Ingredients is the key in almost every recipe..... especially the frugal ones!  The best choice which also involves the most amount of commitment, is to grow your own vegtables.  For those of us who aren't crazy about the whole gardening thing at this point in life a great option is your local famers market.  I was able to get a majority of the vegtables I needed from my parent's garden minus a few odds and ends which I picked up at the farmers market.
Eau Claire Farmer's Market - Mid August

Fresh locally grown produce

Tomatoes and Jalapenos from my parent's garden. 


Let's cut to the chase and get to the price break down for this frugal find idea.  Specialty Salsa from the store is roughly $5 and up per jar.  Salsa made with farmer's market ingredients bought in season will run you about $2.00 a jar.  Salsa made fresh from your own garden is $1.00 or less a jar.  So, in my case we save about $140 a year by canning our own salsa.  What a delicious frugal find!


L

Saturday, August 27, 2011

Free Box Refurbished

Free Box Find Before Picture


Every good garage sale has a free box.  Most of the time the things that make their way into this box are either so worn or broken they should have been thrown away years ago.  For that reason, many people tend to walk right past without a glance... even I am guilty of that from time to time.  Every once in a while there is a gem among the junk.  My gem this weekend was hard to walk past because it didn't fit into a box.  It was a dresser.  Price - Free.  A few hours later and with a little TLC using supplies I already had from previous projects it was a perfect fit for our bedroom set and yet another frugal find. 


After a good cleaning it was time to prime!
Instead of purchasing new hardware I chose to spray paint the old instead.  I did find some at Menards I really liked which would total $7.   The great thing is I can change my mind whenever I like and it will completely change the look.

The Finished Product!  Total Cost- $0.

Friday, August 19, 2011

Frame It

If you are anything like me, you have more than one empty picture frame sitting somewhere around the house.  Over the past year, I have decided to put those frames on display using odds and ends that I have  around the house.  I thought I would share my attempts to be crafty in this frugal find blog post.  Check them out below and maybe you will be inspired to create your own frame. 

Magazine cut outs for my sewing table.


A broken clock face replaced with a scrap of fabric and magazine number cut outs.

The big white frame came out of a free box at a garage sale.  The rest of the frames I had collected over the years.  Thanks to the Walmart fabric center I spent about $1 on fabric to fill them.  A very cheap way to decorate a large wall!

I used a brown paper bag as a background and then magazine cut outs to create this frame for my sewing table.

This frame I made as a baby gift for a friend using fabric, beads, and hot glue.